Thursday, June 30, 2011

LE at 15 Months


I'm a week late getting this out there, but not a whole lot has changed from 14 months.

Now that it's officially summer and the sun is out, we've been trying to play outside a lot. At the end of the summer last year, I used a gift card to buy LE a little inflatable pool for our yard/patio.
She hung out inside the pool for about 10 minutes.

Since then, she's mostly stayed outside of it, playing with the water when it's on or when it's off, reaching over and into the pool to put rocks in and feel the water.
In between fetching rocks and playing with the water, she likes to go pull on the mint plant. Her suit from Mimi is adorable.


She got a new 'do to keep her hair out of her face. The rubber bands are basically the size that are used for braces, but they work pretty well.

Other than that, things are pretty much the same! She loves to talk on the phone (any toy held up to her ear), give kisses, dance and bounce, put things in buckets, hold her little doll LeLe, and have us hold her doll LeLe. She runs just about everywhere and makes friends everywhere we go. If given the chance, she'll run run up to someone, look up at them, smile a big cheesy smile, and wave until they acknowledge her. 

When she thinks she's being funny, she crinkles up her nose. 
She's also a big ice fiend. She'll unabashedly dive her hand into any cup and fish around for ice. 

Still no real words yet from the little one, but she babbles and understands a lot. I can ask her to go find her sippy cup, and she'll run around the house looking for it. If she hears anyone mention shoes, she points at her shoes or sits down to shoe them off. 

Oh, and on the teeth front, she has 10 1/4-- eight front teeth, two molars on opposites sides, and another molar peeking through on one side. 

She sleep about 12 hours a night and takes two naps a day. Speaking of... it's just about time to get ready for the bedtime routine. 

Have a good day!

Wednesday, June 29, 2011

Carrot-Banana Whole Wheat Muffins (or cupcakes)

My little girl turned one year old a few months back. Since family and a few friends came from across the US to celebrate her when she got baptized the month before and then we spent 3 weeks in Fiji leading up to her birthday, we really just wanted to keep her birthday very low-key. 

We also knew that our little one year old didn't need to have a real cake made with sugar. She didn't know any better, and we figure she'll have the rest of her life to be addicted to sugar like her mother. 

I stumbled upon 101 cookbooks's delicious recipe for a "cake" made with no sugar. It's naturally sweetened with dates and bananas. I had never had a date before, but I thought I'd give it a try.

This is the kind of recipe that makes you want to turn up your favorite music, open the windows to let the breeze flow in, and celebrate the ingredients. It feels good.

{Those are carrots on the right, not cheddar cheese, despite what it looks like.}

What we ended up with was something like 18 rustic muffins, and I think John had 2. One year old LE and I ate 16 muffins in 7 days, and I think it was pretty evenly split between the two of us. She loved them. They made the perfect snack and breakfast for pre-molar toddlers who need something more nutritious than Cheddar Bunnies to snack on and less messy than things like yogurt and fruit. 


Since posting about LE's birthday, I've been asked for the recipe a few times by friends. Here it is in all of it's glory! Please visit 101 cookbooks's site to see the original or if you think you'd rather make it in a loaf form. 

I opted for cupcakes for LE's birthday. They are cupcakes when they were frosted and muffins when they weren't. Of course, I prefer frosting to no frosting, but this last time I didn't make it at all. Frosting or not, they turn out very moist and slightly sweet. They don't self-level while baking, so if you're looking for something a little less rustic, you will want to take the time to smooth them out on top after spooning in the batter.


To save a little prep time, I used my food processor to process the nuts first, then the dates, and then the carrots. I didn't wash the bowl between processing and just did the chopping in order of driest to wettest ingredient.


Banana Carrot Cupcakes (or Muffins)
From 101 Cookbooks; for the loaf version, go to the original recipe

Makes 18 regular muffins, or 12 regular + 12 mini

2 cups whole wheat pastry flour or white all-purpose flour
2 1/2 teaspoons baking powder
1 1/2-2 teaspoons cinnamon
3/4 teaspoon salt
3/4 cup finely chopped walnuts
4 ounces unsalted butter, melted
1/2 cup dried chopped dates
3 ripe bananas (1 1/4 cups)
1 1/2 cups grated carrots (about 3 medium)
1/2 cup plain Greek yogurt (2% or lowfat is ok)
2 eggs

Preheat oven to 350. Use paper or silicone cups, spray with cooking spray, or use butter to prep the muffin tin. 

Into a medium bowl, sift together the flour, baking powder, cinnamon, and salt. Stir in the walnuts.

In a small bowl, combine the dates and melted butter. Mash with a fork and try to break down the dates as much as possible. 

In a large bowl, mash the bananas (I used my hands), add the carrots, and combine. Add the date/butter mixture. 

In the small bowl used for the dates/butter (or use a separate bowl if you like to wash dishes), whisk together the eggs and yogurt. Add the mixture to the large bowl with the carrots/bananas/dates/butter, and stir well to combine.

Add the sifted flour mixture to the wet ingredients, stirring until it's just combined. Streaks of flour are good, but make sure you don't have pockets of flour. It's better to undermix a tad than overmix.

Spoon into the prepared muffin tins, filling to almost the top since the muffins won't expand too much. Place in the middle of the oven, and bake for 30-35 minutes. They're ready when the tops are turning golden brown and a toothpick comes out clean. Remove from the oven and let it cool on a rack. 

These are delicious topped with a basic cream cheese frosting to serve as cupcakes. For a refined sugar-free frosting, see the original recipe. Personally, I don't care for that one.  Or, serve warm with or without butter as a muffin for breakfast or a snack.


Tuesday, June 28, 2011

Organic Mint & Honey Sweet Leaf Green Tea


Let's get this straight: I did not in any way anticipate writing about this tea, much less writing about it as my first commercial product to rave about. I couldn't help it, though, after what happened Monday.

Rewind a minute to Sunday when we took a trip to Whole Foods to compare their bulk prices to a local co-op's bulk prices. We ended up leaving with Sweet Leaf's Mint & Honey tea, my new favorite drink. I was even ok with paying $1.49 for it since I knew it was so good.

Fast forward to Monday when LE and I headed to Target to price check essentially every consumable product we use. I stumbled upon Sweet Leaf's tea, but at an incredible deal-- and it's not even a sale! 

Target has Sweet Leaf Organic Mint & Honey Green Tea's 64 oz size for $2 (3 cents/oz)! Compare that to $1.49 for 16 oz (9 cents/oz) at Whole Foods. {i.e. It's 1/3 of the cost per ounce.}

Before you rush off to Amazon to compare prices, I already did that. Even with their Subscribe & Save program where you save 15% and get free shipping, you have to buy 8 bottles at $3/bottle. If you're looking for the smaller glass bottles; however, Amazon offers them at a good price.

This tea is smooth, sweet, and refreshing. Here's how Sweet Leaf describes this tea:
Infused with flavorful spearmint leaves and a touch of honey, this organic green tea has created a cult-like following. Loaded with antioxidants (90mg EGCG) and 100% Vitamin C. 
The ingredients are simple: 
filtered water, organic cane sugar, organic green tea, organic honey, organic spearmint extract, ascorbic acid (vitamin c), citric acid, and natural flavors.


So, if mint tea is your thang, I highly recommend this one!

I was not payed for this review or endorsement. Sweet Leaf does not know who I am. I wrote this because I love their product.

Monday, June 27, 2011

Garden Progress (5) & the hole returned!

Last week, I reported that I planted spinach in the plot again, and there were no signs of digging since. The next day, I discovered the hole returned and tufts of fur were around the area. Nothing was buried there again, which made us think that the animal came back for the big rabbit. I did a little internet research...

and...

we concluded it's a bobcat! Ack!
Image Source
No, I didn't take that photo, thank goodness!

Bobcats apparently bury their prey and then return to it at a later date. Their main sources of prey, especially in Wisconsin, are big snowhares. I imagine it was a little p-o'd that we moved it, but I absolutely don't care. Stay out of my spinach!

Most people probably don't have the threat of a bobcat in their neighborhood. We live almost all of the way at edge of our neighborhood and our house is at the end of a temporary dead end street. On the other side of the dead end sign, there's a big open, overgrown field. Across the little two-lane street from our neighborhood, there's a thickly wooded area and then farmland. Last fall-- I know this will sound crazy-- I saw a mountain lion sitting at the edge of the woods. This spring I saw a big badger and a little fox scurry across to our neighborhood's side of the road. I suppose it's not that strange to think of a bobcat hanging around.

Miraculously, one of the two spinach plants was not destroyed, so I just refilled the hole... again... and hope that the bobcat won't return.

On to our garden progress...


We got to pick our first tomato and lots of peas!

I took a quick peek at our carrots to make sure nothing crazy is going on down there. You never know! Who knew something orange would be there the first time a carrot was grown? Do you think that person thought something was wrong?

We are completely novices when it comes to gardening-- plants and veggies alike-- but with the right resources and the grace of God through weather, anyone can do it! Hopefully, you feel inspired and will want to create your own small garden plot-- it's still not too late to do it this year, especially if you start with plants instead of seeds for most things. Next week, I'll share my resources and garden plan.

Until then... do you grow anything in your yard?

Saturday, June 25, 2011

Refreshing Mojitos


Did you notice all of the mint and lime in that glass? What a marvelous combination! Whoever came up with that is a genius.

I'm a big fan of Mojitos, and given that mint is so prolific, we get to enjoy them frequently throughout the summer. I know that some of my readers don't drink alcohol, so it's worth saying that they are delicious with or without alcohol. 

And you know what? They are actually inexpensive, despite what you may pay at a bar. One Mojito will cost less than $2. Going sans-alcohol? One Mojito will cost you less than $1!

So let's get started! There are a few steps, but really, once you make one or two, you'll be a pro.


The key to a good Mojito is taking the time to gently muddle the fresh mint leaves with a couple of lime wedges and the simple sugar so that you extract the flavorful oil from the mint leaves. If you skip this step, you'll end up with a sweet limeade as opposed to a minty limeade. The muddling of the mint makes all of the difference.


Add the rum (if you're using it), and a big handful of ice. Shake everything vigorously for about 10-15 seconds. You want that baby to be cold. I don't real bar equipment, so I just use a mason jar. Prior to owning jars, I used two glasses. Just use what you have.


Add a splash of soda water, gently stir, garnish with the last lime wedge, and enjoy!


Ahhhh!

Mojitos
Makes 1 drink

Ingredients
1 ounce simple syrup (recipe below); or, if you must, use 1 tsp sugar
1 lime
1 large pinch of mint leaves-- don't skimp
2 ounces rum
2 ounces soda water
ice

It's best to start with cold ingredients so that you don't melt all of the ice when it comes time to add it.

Cut the lime into quarters. Squeeze three lime wedges into the glass or jar. Put a generous pinch of mint into the jar (see the first image for an idea of how much), and add your simple syrup (or sugar). Take your muddler (or if you're me, a wooden spoon), and gently crush the mint leaves against the lime wedges. Your goal is to extract the flavorful oils from the mint leaves but not bruising them.

Add the rum, a big handful of ice-- about 5-7 large cubes-- and shake your drink vigorously for 10-15 seconds to get it nicely cold and mixed. Transfer it to a glass or whatever you're planning on drinking out of. 

Add up to 2 ounces of soda water, garnish with the last wedge of lime and a sprig of mint. Enjoy!

Simple Syrup

Ingredients
Sugar*
Water

Add equal parts water and granulated sugar to a saucepan, and heat over medium until all of the sugar has dissolved. Store in a closed container in the fridge for up to 2 months. Preferably, cool completely before using in a mojito so that it doesn't melt the ice. 

*Simple syrup will be clear unless you use cane sugar like I used. Your drinks won't look quite as crisp and refreshing with the darker syrup than it would with white sugar simple syrup. The flavor of cane sugar simple syrup is much more subtle and naturally sweet than simple sugar made with white sugar. I like both, and I may even prefer the white sugar version better than cane sugar in this application.


Thursday, June 23, 2011

Garden Progress (4)


Wow, our garden is making loads of progress! I can't believe it's already Thursday, and I took these photos on Monday. Oops. I've had a salad from our garden every night this week. There's something very satisfying from eating the food that you grow yourself. 

There are about 10 of these guys on their way and one bigger guy (in the background of this photo).

Here's the funny thing... I spent about 20 minutes on Saturday looking up information on growing sugar sweet peas because mine weren't producing. The plant was growing beautifully, but I hadn't seen anything out there the days leading up to then. That evening, we had some friends over-- in fact, they are the ones who lent me the book on how to start this garden-- and we found a couple of peas on their way! By Monday, I had picked a handful off of the vines. LE had her first sample, too.  
That was about all she ate... and not even that got swallowed. It's not exactly the best veggie to attempt to eat without back teeth.

 These little butterflies are radishes sprouting. I'm not sure why I didn't label the photo, but I think you'll forgive me for that. Right??

The new spinach and lettuce that I planted last week are sprouting, too! Everything is on its way. If you don't have at least an herb garden, I highly recommend you start one. It's not too late for this year, you'll get a lot of satisfaction from it, and you'll save money on fresh herbs.

Wednesday, June 22, 2011

You Are My Sunshine Freebie


You've all heard the song, read the phrase, and seen it on a million prints in kids' rooms tours across the blogosphere. You'd think it'd be tired, but there's something about that tune that gets me singing it to LE without realizing it. After many rainy days this spring and a newly gifted Silhouette from my parents (!), I knew that I wanted to create some sort of design for LE to wear.

I bought a couple of plain white long-sleeve shirts on clearance at Target and a pair of yellow striped pants at a garage sale. Then I used Illustrator to create this design:


After I had it all cut out with the Silhouette, I noticed that the cursive "are my" font was way too thin for the material. I had to scrap those words and change it to the same cursive as "when skies...."

It seems as though at some places, I knew that you shouldn't put a color over another color with iron-ons, especially the flocked iron-on material that I bought from Silhouette. In other places, I didn't keep that in mind; I had to use scissors to cut out pieces of the yellow sun.

I wanted to share the design with you to create your own shirts or whatever you want. I went back to Illustrator to fix the errors, and the design now looks like this:

I saved it as a Silhouette file that should be really easy for you to use. All of the gray is grouped and all of the yellow is grouped together. Place the appropriate grouping on the artboard and cut each grouping one at a time. It's already mirrored so that you don't have to worry to remember to do that for cutting.


If you want to resize the image, to get them both the same size, you should place them both in the same area and resize them together. 


When it comes time to apply to your shirt, it should be really easy to figure out how to put them together since they fit much like a puzzle.

If you have issues or questions, let me know! I hope you enjoy it! (File links are below)


Click on the link to get directed to YouSendIt or Google to download:
Yousendit (good until August 17, 2012)
Email me at any date and I'll send it to you-- no spam, pop-ups, ads... can't beat it! :)

Monday, June 20, 2011

Mint Fudgcicles


On Sunday at the church nursery, my daughter somehow cut her gum right under her top lip. I recognized her cry before we got to the counter to pick her up, and when we spotted her, blood was starting to pool in her mouth. The cut was in a spot that made sucking a pacifier painful. 

No morning nap + busted up mouth + no pacifier = unhappy little girl. Her cut reopened during her afternoon nap, making an even fussier little girl. She wouldn't take ice chips, her sippy cup, or any other distractions that we could think of. 
But, she did take a fudgcicle. Typically, we don't give LE sweets. If you give your own pre-toddler sweets, that's your prerogative; I'm not here to tell you not to. 

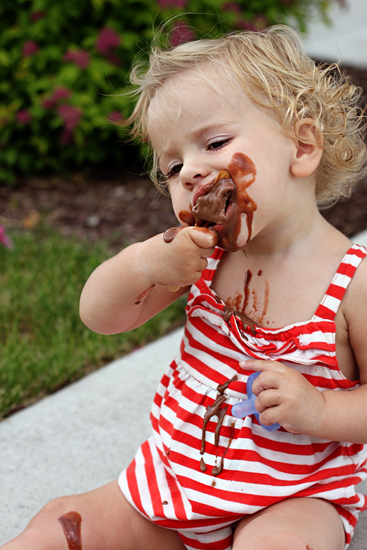
This was an exception to our no-sweets rule, though. She needed something to soothe her mouth-- something cold. She sat outside on our driveway and ate the whole thing without stopping and without smiling. She was on a mission, and the fudgcicle really helped her forget that she was supposed to be unhappy.

John likes fudgcicles a lot, probably because fudgcicles are essentially just frozen pudding. I, on the other hand, fall in the take-it-or-leave-it category. Sure, pudding is ok, but I prefer a much richer, sweeter dessert route, and fudgcicles just don't go there.

I tried out the recipe on Smitten Kitchen's site, and they turned out creamy, smooth, and not at all icy. Even John liked them, and he's kind of picky when it comes to fudgcicles. 

If you're restricting your sugar intake, try subbing out the sugar for Truvia. Try reducing the fat by opting for 2% milk (though you risk it becoming a little too icy). Add a different flavor extract. 

The second time I made these, I increased the chocolate just a tad and added mint extract to make mint fudgcicles. These were my favorite of the two.

The beauty of these is that they are budget-friendly and simple. You can get a sweet, cold treat using common ingredients that most of you already have in your pantry. I didn't have to go buy anything for these.


You can find popsicle molds everywhere these days. Michaels has them for $1. I used a silicone mold (brand/source unknown) that my mother-in-law gave me when she was clearing out some of her baking goods. You could also use small cups or ice cube trays for mini popsicles, perfect for toddlers. Cut popsicle sticks in half, wait for 30 minutes into the freezing time, and insert the sticks into the middle of each cube.


Fudgcicles
Adapted from Smitten Kitchen who adapted it from On A Stick

Makes 4 standard popsicles

Ingredients
2 1/2 tablespoons (approx 25 grams) semi-sweet chocolate chips (choc chips vary so much in size, I weigh mine)
1/3 cup sugar
1 tablespoon cornstarch
1 1/2 tablespoons unsweetend cocoa powder
1 1/4 cups whole milk
pinch of salt
1/2 teaspoon vanilla extra (or sub out with a different flavor, like I did; mint is delicious!)
1/2 tablespoon unsalted butter

Over very low heat, melt the chocolate chips in a medium saucepan, stirring constantly. Stir in the sugar, cornstarch, and cocoa powder. To prevent lumps, add just a splash of the milk, continuing to stir constantly so that the chocolate mixture combines with the milk. Add the rest of the milk to the pan, and increase the heat to medium. Cook the mixture for 5-10 minutes, until the mixture coats the spoon well and turns to a thin pudding consistency.

Remove the pan from the heat, add the vanilla extract (or other extract) and butter. Stir to combine, and then pour into your molds. Wait until it's fully frozen, at least 3 hours, before enjoying!


Here's where I usually link up! 

Sunday, June 19, 2011

Happy Father's Day!


Silhouette had a version of the graphic above in their store a couple of weeks ago, and I quickly downloaded it. Instantly, "dad" and the moustache reminded me of this cool guy:


Yes, check it out! I never really knew my dad as a moustache kind of guy, so when my older brother and I first saw this photo years ago, we laughed for a long time.

Thanks for being my soccer coach; encouraging us how to be silly through your songs and dances (funky tut!); forcing me to have tough conversations; and sharing all of your guidance that I cared and didn't care to accept. You are a wonderful dad and grandfather. Love you lots!


And to my husband:

You are an amazing father to LE. It is sweet how you take care of her the way that you do, and it's obvious that she's smitten with her dad. She and I are fortunate to have someone who loves and provides so much.


I'm blessed to have you both in my life.

Love,
Nicole