Showing posts with label LE's room. Show all posts

Tuesday, October 11, 2011

Clock DIY Make-Over


Last week, I saw a post online where someone repurposed an old clock by taking off the face and painting it. I tried looking around, but I couldn't find that post again. I've been wanting to add a clock to LE's room, but I really didn't want to spend more than $10 bucks on one. 

I casually looked around for a little while. It wasn't until I had to go to Walmart to buy spraypaint (the cheapest place I've found it) that I walked by their clock aisle. Their basic Mainstays brand 8.75 inch wall clock comes in a few colors, and it costs under $4. Add a little scrapbook paper for less than $1. Bingo! A new clock that comes in under 5 bucks.


If you have an old clock that needs new life, or if you're like me and need to revamp a new clock, follow along for the step by step. I'll explain how to do this using thick scrapbook paper as the face of the clock, but with small adjustments to the tutorial, you could use fabric or paint instead. I was able to get this very easy DIY done from start to finish during LE's nap. 


Take a mental note of how the clock hands are placed before you take your clock apart. Flip your clock over and remove the screws that are keeping the face to the back.  Snap out the battery pack, which will remove your clock hands.


Flip the clock back over to the front. Measure the width of the inside. The Mainstays clock face is 7.75in. If the clock face isn't glued in (mine was), remove and discard it.


If you have a Silhouette craft cutter, your job will be super easy (skip to instructions). If not, it will just be mildly more difficult. Print a circle the size of the clock's face (use Microsoft Word or other software that allows you to specify the exact size of shapes) onto the back side of your scrapbook paper. Use scissors to cut out the circle. You should probably buy die cut numbers for the clock unless you are really good with cutting. 

For the Silhouette users:
  • Open Silhouette and draw a circle to fit your clock's face. (7.75in for the Mainstays clock)
  • Pick a font that you like for the numbers. I used Skia.
  • Adjust the size of your numbers until you like it. The 12 in my clock was 2.5in, measuring from the top to the bottom of the 1. 

  • Once you get everything to the size that you like, move all of the numbers and extras to the outside of the circle.
  • If you're using the same paper for everything, send your paper through the Silhouette on a mat. For thick cardstock, use the pink blade at 2 speed and 33 thickness. I didn't find double-cutting necessary.
    • If you're using different paper for the numbers, just make sure you tell the Silhouette which items to cut (e.g. just the circle or all of the numbers/dots)
  • Use Mod-Podge, spray glue, or your choice of non-wrinkling adhesive to adhere the paper circle to clock's face. Before adhering, take note of where the 12 is on your original clock. You'll need to be sure that's the top of your new clock's design since that aligns with the hanging mechanism on the back of the clock.
  • Paint your cut out numbers, if needed. Apply glue dots or your choice of adhesive to the back of the numbers. Adhere the 12, 9, 6, & 3 (not the dots yet); that will allow you to get them straight. If your clock is like the Mainstays one, there are visible screw holes to help guide you. 
  • Poke a small hole in the paper and then push the battery pack through from the front to the back. This will make your paper bend towards the back. Carefully remove the battery pack and reattach it to the clock the correct way.
  • Attach the hands the same way that they were originally. For the Mainstays clock, the hour hand goes first shiny side up. Then, the minute hand goes matte side up, and then the second hand snaps in on top. 
  • Rotate the hands so that all of them line up at 12. Using the dial on the back of the clock, turn it to 1. Place a dot. Then use the dial to turn it to 2. Place a dot. Continue for the rest of the dots. This ensures that you are placing them in the correct places.
  • Place the glass and cover back on the clock. Screw everything back in place. Admire your new clock!

I haven't decided where in LE's room to place the clock yet. For now, it will live with the sock monkey.

Tuesday, August 16, 2011

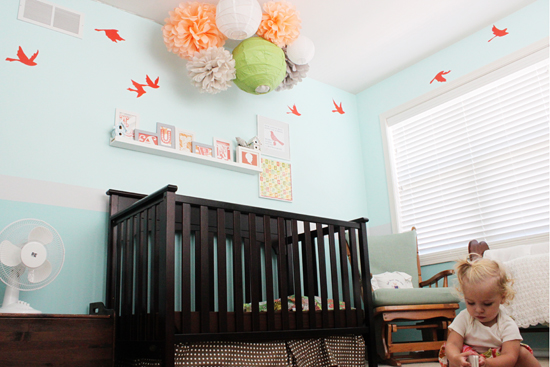
LE's room tour

 Welcome! Come on in! 

Standing at the door, looking in:
The tree is understated but not quite as much as it is in the photo.

Sitting on the floor in the corner by the forward-facing bookshelves:

Standing in the corner with the glider:

That's it! I love how her room is whimsical, but it's also filled with things that have meaning. 
  • The gray lamp is from my grandparents on my dad's side (repainted).
  • The sock monkey is reminiscent of my mom and grandma.
  • The SMU frog is a gift from my step-mom during my first days at SMU, where John and I both went to college.
  • The laugh sign is a gift from my friend Ashley when I was in college (repainted).
  • The photo with bunting and the necklace around the sock monkey's neck are from our trip to Fiji.
  • The toy box that the fan is on was built by my dad and my older brother's and mine growing up.
  • The pillow on the glider was a gift from John's parents at LE's baptism.
  • The blanket holder was in my room growing up and now holds John's baby blankets, my baby quilt, and the quilts that my step-mom labored over for LE.
  • The red rain boots are from when John was a baby. (They're LE's current size so they aren't on display.)
  • The wagon was a pregnancy gift from a company I worked with.

The paper bunting was used last weekend at a baby shower, and I figured it could hang at least temporarily in LE's room. I'm on the fence with whether it's bunting overkill with the small one on the frame and the larger one on the window. I love the paper design from How About Orange.

I installed a craft paper roll under her little table for drawing.

I'll be repainting the glider the same light gray as the stripe and the dollhouse that's hiding in LE's closet will come down for her to play with. 

Thanks for stopping by!

Sunday, August 7, 2011

And what got painted were... (drumroll)

Bookshelves!

LE and I tagged along with John to Chicago a few weeks back just so I could go to Ikea to buy their $4 wooden spice racks that have popped up around cute kids' rooms across the blogosphere. Like this photo that was posted on Ohdeedoh:


Even before LE was born, I knew I wanted forward-facing bookshelves. Supposedly, they foster more of a desire for reading than traditional bookshelves since kids can actually see the book covers. I can't vouch for the truth in that. What I can say is that I imagine everyone has a space in their home that could make room for a narrow bookshelf (spots behind doors come to mind). 

About 1 1/2 years ago, I started keeping my eye out for forward-facing shelves. Garage sale hunts came up empty, and to my dismay, the shelves that I found in stores were way too expensive for me to rationalize.  

I bookmarked a few different great ideas for DIY: a fabric sling {tutorial}, rain gutter bookshelves {tutorial}, and build my own {tutorial}. These are all ideas that I'd love to do, but they'd end up just sitting in my bookmark list forever and never get done... just like they did for a full year.

After considering different options, the Ikea spice racks for $4/ea were just the right fit for us. I love that they come in unfinished wood so that we could paint them in the darker gray accent color for LE's room.

Here's how ours turned out:

Everyone knows that there's going to be a difference in quality between Ikea and Pottery Barn. I was willing to live with the little imperfections for the cost (I  mean $4 vs $40-60. No brainer.), especially since they're sturdy. 


The pieces of wood just don't line up perfectly, but the one who matters-- LE-- will never care.

I have to tell you, these shelves are the easiest shelves to put together and hang. We've done a lot of floating shelves, including ones from Pottery Barn that are supposedly super simple, but none were this simple.


What I did:
For these shelves, it took a quick coat of regular primer and two coats of paint that I got for free from Benjamin Moore. Since the paint was matte, I sprayed a light coat of polyurethane to give it a slight sheen but not make it shiny. It took about 5 minutes per shelf to assemble using the dinky allen wrench that comes with them. Then, it took about a half an hour to install in the wall using drywall anchors when I wasn't hitting a stud.

I love how the shelves turned out and fill that wall space! LE seems to love pulling books off of them, too.

Saturday, June 12, 2010

Birdhouse Accessories


I stumbled across some plain wooden birdhouses on sale at Michaels a few weeks ago. They were $1 each, and I picked out 4 different styles. They are lightweight and purely decorative-- definitely not anything I'd actually use as a real birdhouse-- and the perfect accessory for LE's bird themed room.

The plain birdhouses were just too, well, plain, but covered with cute scrapbook paper or paint, they'd be perfect to mount in a cluster on a wall or hang from the ceiling as a mobile. I haven't decided which to do yet.

All of the materials that I used to create them are below. Most of them are optional items I had on hand.


  1. Birdhouse
  2. Cutting surface (only if you are using a razor to cut)
  3. Colorful [super cute] paper
  4. Paper cutter (optional)
  5. Paintbrushes
  6. Razor or box cutter
  7. Paint
  8. Water (optional)
  9. Glue (I didn't have glue at home for the first house, so I made my own with cornstarch and water.)
  10. Scissors
All you do is paint the small areas and parts that you don't want to cover in paper. Then, using one of the cutting apparatuses, cut out the paper to cover the sections of the birdhouse. Apply a layer of glue to the house. I watered my glue down and spread an even coat with the paintbrush. Press the paper down firmly and make the creases crisp. Voila! You're done!

I'm on the fence about getting some clear spray paint or mod podge to seal it. They can sit on a shelf if you want. I'll either drill a hole in the back to mount it on the wall or put a hole on the top to string fishing wire through to hang it from the ceiling. I'll post pictures when they are hung.


Creating LE's Masterpiece of a Room... or not

My dear friend, Ashleigh, recently asked to see photos of LE's room. Since we just moved into our newly built home less than two months ago (we closed on the house when LE was 9 days old), John and I decided to hold off on transforming her room from four white walls into a masterpiece. We wanted to get our downstairs set up first-- the part that we use. LE doesn't even sleep in her room yet, so I don't think that she feels like she's missing out on anything. That and the fact that a.) she won't remember, and b.) she can only see about 2 feet in front of her at this time.

Now that we're mostly settled and I'm getting bored of white walls upstairs, I've started designing her room. I always knew that I wanted to incorporate a bird/tree theme even though I've noticed over the last year that that is not very original. I'm going to make it original, gosh darn it! Oh, and inexpensive.

I've been mentally cataloging and electronically cataloging with Evernote ideas for LE's room. I'll start posting the developments as they happen... first to come are little birdhouses.