Wednesday, August 31, 2011

Getting ready for Christmas. Wait, what?

A few weeks ago, a friend of mine commented on Facebook that she was shocked to come across Halloween supplies in a store that she went to. Halloween was almost 3 months away at that point.

Sadly, I could trump her and say that I had already spotted Christmas supplies in Michaels Craft Store. In early August. Seriously.

Since then, many craft blogs, including the blog that many of you love-- Tatertots and Jello-- have mentioned working on Halloween projects already. Noooo! I'm still making s'mores for goodness sake. Please keep summer around!

I kept quiet and mostly to myself until now. We received the Pottery Barn Kids catalog in the mail a few days ago, and I could not help but laugh. Maybe you saw it, too.


Moving past the fact that this is a Halloween decoration coming to me in August, in and of itself, this is not funny. In fact, I kind of like it. They are simple, understated, and not too scary. The description reads something like, "Styrofoam balls draped in cotton..." Time out. What? Did you say styrofoam? Do you want to guess how much these styrofoam balls cost? $70. That is funny.

DIY:

  • Styrofoam balls from craft store (probably even the Dollar Store?); or, to take up less room in storage, use inflatable beach balls. Surely those are on sale right about now. 
  • Muslin ripped at the ends. Or, use old white pillowcases or sheets. 
  • Sharpie the eyes.
  • Use fishing line to hang.
I've officially been duped into posting about Halloween two months prior to the "big" day. Help.


Tuesday, August 30, 2011

S'Mores Cupcakes


Yeah, you don't have to tell me. S'mores have been done. Overdone. If you look even casually at foodgawker or Pinterest, you've seen s'mores cakes, cupcakes, traditional with different candybars, in jars, cake pops, ice cream, cookies, bars, pies, tarts, pudding, pizza, rice krispie treats, popsicles... need I go on? For the love of s'mores, it's time to yell out "enough already!"


But, I like s'mores.  Last week, when I was thinking of what to bring to a house warming party, I browsed my arsenal of recipes, and the s'mores cupcakes done by Trophy Cupcakes kept pulling me in. Plus, we were inviting friends over to sit around our firepit on a gloriously perfect evening the night before the party. Patio + firepit + friends = s'mores. Double Plus, I already had all of the supplies on hand.

Ok, enough excuses on why I chose s'mores even though they've been done a million times before by everyone.

Here's the deal. These were good.

About 30 minutes after these cupcakes came out of the oven, I bit into the not-quite-cooled, unfrosted cupcake and thought, 'mmm, these are good." Then about an hour later John got home, saw my half-eaten cupcake and asked if he could try. He bit into it and said decidedly, "Wow, those are good."


Oh, and I tried the cupcakes out on Friday night using the meringue, marshmallowy frosting from the Lemon Meringue cupcakes that I did earlier this summer, and though it was perfect for the lemon, it was not nearly as good on these cupcakes as the one in the Trophy Cupcakes' recipe. It's smooth and full of marshmallow flavor.


S'mores Cupcakes
From Trophy Cupcakes
Makes 2 dozen (for me, it made 31 cupcakes)

Cake Ingredients
2 1/4 cup + 2 tbs sugar
1 3/4 cup all purpose flour
3/4 cup + 1 tbs cocoa powder (not Dutch processed)
1 1/2 tsp baking soda
1 1/2 tsp baking powder
1 tsp salt
2 large eggs
1 cup whole milk
1/2 cup vegetable oil
2 tsp vanilla extract
1 cup boiling water
1 1/2 cup graham cracker crumbs (about 20 crackers)
1/3 cup unsalted butter, melted
9 oz bittersweet chocolate, as finely chopped as you can

Preheat oven to 350, and line 2 standard muffin tins or spray with cooking spray.

Place your sifter over your mixer bowl. Sift into the bowl 2 cups plus 2 tbs sugar (reserving the remaining 1/4 cup for later), flour, cocoa powder, baking soda, baking powder, and salt. Using your paddle attachment, mix on low just to combine.

In a separate medium bowl, lightly whisk the eggs, milk, oil, and vanilla. Pour into the flour mixture, and mix on low until incorporated slightly (so that it doesn't blow flour everywhere) and then increase the speed to medium to mix for 30 seconds. Scrape down the bowl and mix on medium for an additional 2 minutes. Pour in your boiling water. Using a spoon (not the mixer) stir to combine. The batter will be very runny.

In another medium bowl, stir together the graham cracker crumbs, 1/4 cup of sugar, and melted butter.

Spoon 2 tbs of graham cracker mixture into each muffin cup (there will be some leftover). Using the bottom of a small glass cup, firmly press the graham cracker into the bottom of the muffin cup, creating a crust. It may stick to the glass slightly. If you have major issues with that, try using a small circle of parchment paper in between the glass and crust.

Sprinkle evenly 2 generous tsp of finely chopped chocolate on top of the crust. The chocolate won't spread much, so even it out with your finger or a spoon at this point. And don't skimp! I thought the chocolate layer would taste a bit out of place here and too raw, but instead, I found myself wishing I had added more of it.

Place both tins side by side on the middle rack of the oven, and bake for 5 minutes. The crusts should turn light golden brown.

Remove from oven and carefully pour the batter into the cups, filling 3/4 of the way (see the image above). Sprinkle the remaining chopped chocolate and then graham cracker mixture over the top of the batter.

Bake one tin at a time for 17-20 minutes, or until the tops are set and a toothpick inserted into the center comes out with a few crumbs attached.  Let the cupcakes cool in the pan for 10 minutes before transferring to a wire rack to cool completely, at least an hour.


Frosting 

Makes enough for about 3 dozen cupcakes; I plan on halving this recipe when I make these again, but if you feel nervous about running out of frosting, I guess you should make the whole batch. You can see below that I had somewhere between 1/3 - 1/2 a batch leftover after generously topping 25 cupcakes.


Ingredients
8 large egg whites
2 cups sugar
1/2 tsp cream of tartar
2 tsp vanilla extract

In the electric mixer bowl, add the eggs, sugar, and cream of tartar. Place over a small simmering saucepan of water (like a double boiler) and whisk continuously for 3-5 minutes until the sugar is completely dissolved and the mixture is getting hot and foamy.

Transfer bowl to the mixer. With the whisk attachment, gradually increase the speed from low to high, beating until stiff, glossy peaks form, 5-7 minutes. Add the vanilla, and mix briefly to incorporate.

Spoon frosting into a piping bag fitted with a large tip (I used 1M). Pipe a generous spiral on top of each cupcake. With a kitchen torch, carefully brown the frosting as much or as little as you like. Trophy Cupcakes opts for the more gentle approach whereas I prefer to actually taste the toasted marshmallow and brown it more heavily.

Leftover frosting
Cupcakes store in an airtight container for up to 2 days. Frosting does not pipe well a day later, so pipe the frosting the same day that you use it. Cover with plastic wrap flush to the surface if not using immediately and leave at room temperature.

Sunday, August 28, 2011

Sneak Peek


I don't have the energy to write up the details tonight, but as a sneak peek, I whipped up these little beauties this weekend. They were really delicious. Recipe and more to come soon!

Friday, August 26, 2011

Shutterfly (again, I know)

One last thing... I know I mentioned that Shutterfly likes to give away promo codes for freebies. Here's my current stash:


Monday, August 22, 2011

Trip Up to Door County

John grew up vacationing in Door County, and every year that we've been married, we've gone up there, too. John's aunt and uncle, Kay and John, rent a cabin a street from the water for 2 months in the summer to get away from the Florida heat. They generously invite us to stay with them, and we gladly accept!

In case you are wondering, Door County is the little peninsula that juts out in between Green Bay and Lake Michigan. It's about 4 hours from Madison to where we stay in Door County (5 hours when having to stop with LE).
(Map image not mine.)
Kay and John's cabin is on the bay side and has a water view. It's steps away to the rocky water's edge, which is the perfect place to watch the sun set over the bay.

Fast forward two evenings later... 

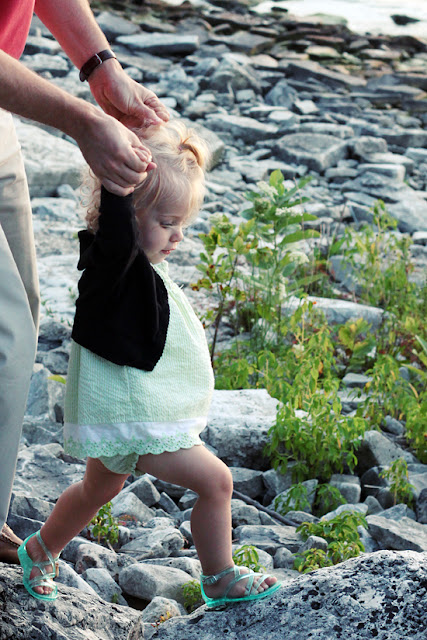
There are a few small beaches on the bay side, too.  We spent one afternoon at the beach down the road from the cabin. LE wasn't exactly fond of the water, but she did enjoy slowly shoveling sand into her bucket. It took her about 20 minutes to fill it each time.


The lake side doesn't have beautiful sunsets, but the sand and water are beautiful. We stopped by on our way out of town for LE to put her feet in the sand like she did for the first time 11 months ago.

Of course, we stopped by the Yum Yum Tree candy shop and Wilson's Restaurant, just like previous years. They remain completely unchanged. We don't have any photos of it, but another tradition is to stop at The Main Course kitchen shop to buy some kitchen gadgets from John's cousin. Every item we've gotten from there has turned out to be a can't-live-without kitchen item. Seriously.

Back at the cabin, we continued the tradition of feeding the chipmunks, working on puzzles, and enjoying big breakfasts.

This year was the first time we went to The Farm, which is a big farm that allows you to pet and feed their animals.
I'm fairly certain that this is the largest horse I've ever seen. 
LE really enjoyed pretending to drive.
At the end of our trip, we took a couple of family photos. 

LE was a bit distracted by looking for chipmunks.

Thanks for a great trip, Kay and John!

And just for fun...

Look at how much LE has changed in 11 months!


And, as a side note, last year we came up in September when it was apple picking season. We stopped on the way up to pick apples. This year, instead of apples, we went clothes picking at the outlet mall. We ended up with something like 4 pairs of shoes for LE among other things.

Aren't these the cutest little bitty Merrells you've ever seen? 


Sunday, August 21, 2011

Photo Books with Shutterfly

For almost LE's first year of life, I put together photo books every two months or so with Shutterfly. We switched from Blurb books due to the quality and ease of making the books. Blurb's system was way too buggy for Macs when I made the switch (which is rumored to be fixed now).

With Shutterfly, it is easy to make the layouts in InDesign and upload the jpegs into a blank book. They have layout options for those who don't have design programs or who want to use the cute designs that they prepare for you. The issue I had was when I wanted to add photos in a certain way and wasn't able to change it up the way I wanted.

Inside look at one of the books we did using Shutterfly's design

Recently, Shutterfly made their online system completely customizable. You can go on their website, use their designs, and completely manipulate the photo layouts to however you want. It's a great option for those who don't want to start from scratch but have an opinion on how they want it done.

Of course, Shutterfly has products other than photo books. I've used them for their photo prints picked up at Target (same quality as places like Walmart and Snapfish); greeting cards; baptism invitesChristmas cards; and large poster prints for a banquet. Quite honestly, Shutterfly's designs and card quality aren't my favorite; I prefer to use Tiny Prints for that, though, interestingly, Shutterfly did just acquire Tiny Prints this year.

Baptism Invite

Christmas Card 2010
I must say that my favorite part about Shutterfly is their customer relations. They give promo codes galor and have great on-site sales. I've also called customer service multiple times, and I have nothing but good things to say about their customer service.

Speaking of promos... though all of these opinions are my own, Shutterfly has offered me one free photo book in exchange for a blog post. 

Tuesday, August 16, 2011

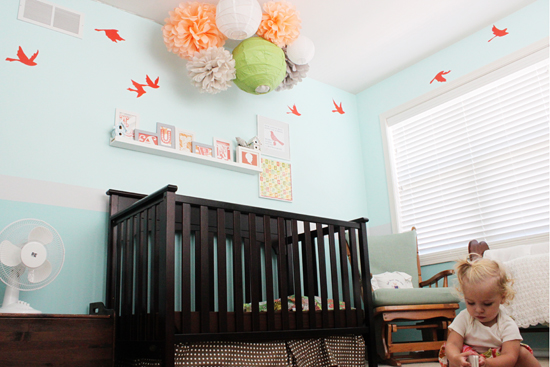
LE's room tour

 Welcome! Come on in! 

Standing at the door, looking in:
The tree is understated but not quite as much as it is in the photo.

Sitting on the floor in the corner by the forward-facing bookshelves:

Standing in the corner with the glider:

That's it! I love how her room is whimsical, but it's also filled with things that have meaning. 
  • The gray lamp is from my grandparents on my dad's side (repainted).
  • The sock monkey is reminiscent of my mom and grandma.
  • The SMU frog is a gift from my step-mom during my first days at SMU, where John and I both went to college.
  • The laugh sign is a gift from my friend Ashley when I was in college (repainted).
  • The photo with bunting and the necklace around the sock monkey's neck are from our trip to Fiji.
  • The toy box that the fan is on was built by my dad and my older brother's and mine growing up.
  • The pillow on the glider was a gift from John's parents at LE's baptism.
  • The blanket holder was in my room growing up and now holds John's baby blankets, my baby quilt, and the quilts that my step-mom labored over for LE.
  • The red rain boots are from when John was a baby. (They're LE's current size so they aren't on display.)
  • The wagon was a pregnancy gift from a company I worked with.

The paper bunting was used last weekend at a baby shower, and I figured it could hang at least temporarily in LE's room. I'm on the fence with whether it's bunting overkill with the small one on the frame and the larger one on the window. I love the paper design from How About Orange.

I installed a craft paper roll under her little table for drawing.

I'll be repainting the glider the same light gray as the stripe and the dollhouse that's hiding in LE's closet will come down for her to play with. 

Thanks for stopping by!

Put your handwriting font to use

Remember a few weeks ago when I posted a tutorial on how to make your own font using your handwriting? Here's a snippet of a flyer that I did for our local Young Life area that uses my handwriting font:


If you have Illustrator and want the vector images for the notepad pages, click here

Monday, August 15, 2011

Spice Racks as... spice racks

Last week, I posted about how we used IKEA's spice racks as inexpensive forward-facing bookshelves in LE's room.

I'd be remiss to leave out that we used the spice racks as... wait for it... spice racks! Once again, 16 months ago I spent waaaay too long searching for the perfect spice rack from places like Home Depot, Menards, Target, Amazon, and more Amazon.

I settled on these spice racks, and, I must say, I'm so glad that I did!

Even where there are jars that are not flush to the railing and door/other bottle, I swung the door open and closed as hard as I could repeatedly without it budging. That was my biggest fear.

What I liked even more about these is that they are on individual rows, so I could completely customize how many we have based on our spices. As you can see, we have a large variety of spice brands-- Penzeys, Market Pantry, McCormicks, Tony's, and a Dijon mustard jar that I keep our Emeril's spice mixture. All types of the bottles fit nicely.

The best part of it all? Using the unused space on the back of the door opened up 2/3 of a pantry shelf.

It's so simple to do! All 4 shelves took about 20 minutes to hang. If you want to replicate it, I found that the appropriate space is 4 1/2 inches measuring from the bottom of the upper shelf to the screw hole for the shelf directly underneath.

Friday, August 12, 2011

Quick Tip: Fewer Dishes!

It's no secret. If you cook from scratch, you will inevitably have a lot of dirty dishes, including what seems to be every measuring device you own. 

To reduce my dishwashing load, I eyeball most measurements unless I'm baking something finicky, like cakes and cookies. Here's how:

Tip 1:
Hold the measuring cup above the bowl and pour next to it, directly into the bowl. The measuring cup serves as a reminder of how much you're aiming to pour in.

Tip 2: 
If you're not confident in eyeballing your measurements, take a minute to look at your recipe. A little basic math can help you. Will you need a tablespoon someplace and a 1/4 cup someplace else? 

I very frequently use 4 tablespoons instead of dirtying up my 1/4 measuring spoon. Or, fill larger measuring cups halfway for smaller increments. My baked oatmeal recipe is a great example of only needing to dirty a half cup and a teaspoon (I even measure the milk in the dry measuring cup since it doesn't need to be precise here).

Sometimes, I mix up in my head what the equivalents are, so I reference Martha Stewart's Cooks Helpers that I have on my fridge as a quick refresher. 

Printing these out on magnetic paper or adhering a couple of magnets on the back of cardstock would make a great present topper for any cooking-related gift!


Sunday, August 7, 2011

And what got painted were... (drumroll)

Bookshelves!

LE and I tagged along with John to Chicago a few weeks back just so I could go to Ikea to buy their $4 wooden spice racks that have popped up around cute kids' rooms across the blogosphere. Like this photo that was posted on Ohdeedoh:


Even before LE was born, I knew I wanted forward-facing bookshelves. Supposedly, they foster more of a desire for reading than traditional bookshelves since kids can actually see the book covers. I can't vouch for the truth in that. What I can say is that I imagine everyone has a space in their home that could make room for a narrow bookshelf (spots behind doors come to mind). 

About 1 1/2 years ago, I started keeping my eye out for forward-facing shelves. Garage sale hunts came up empty, and to my dismay, the shelves that I found in stores were way too expensive for me to rationalize.  

I bookmarked a few different great ideas for DIY: a fabric sling {tutorial}, rain gutter bookshelves {tutorial}, and build my own {tutorial}. These are all ideas that I'd love to do, but they'd end up just sitting in my bookmark list forever and never get done... just like they did for a full year.

After considering different options, the Ikea spice racks for $4/ea were just the right fit for us. I love that they come in unfinished wood so that we could paint them in the darker gray accent color for LE's room.

Here's how ours turned out:

Everyone knows that there's going to be a difference in quality between Ikea and Pottery Barn. I was willing to live with the little imperfections for the cost (I  mean $4 vs $40-60. No brainer.), especially since they're sturdy. 


The pieces of wood just don't line up perfectly, but the one who matters-- LE-- will never care.

I have to tell you, these shelves are the easiest shelves to put together and hang. We've done a lot of floating shelves, including ones from Pottery Barn that are supposedly super simple, but none were this simple.


What I did:
For these shelves, it took a quick coat of regular primer and two coats of paint that I got for free from Benjamin Moore. Since the paint was matte, I sprayed a light coat of polyurethane to give it a slight sheen but not make it shiny. It took about 5 minutes per shelf to assemble using the dinky allen wrench that comes with them. Then, it took about a half an hour to install in the wall using drywall anchors when I wasn't hitting a stud.

I love how the shelves turned out and fill that wall space! LE seems to love pulling books off of them, too.